How We Created Our Photo Studio and You Can Too
Oct 28, 2019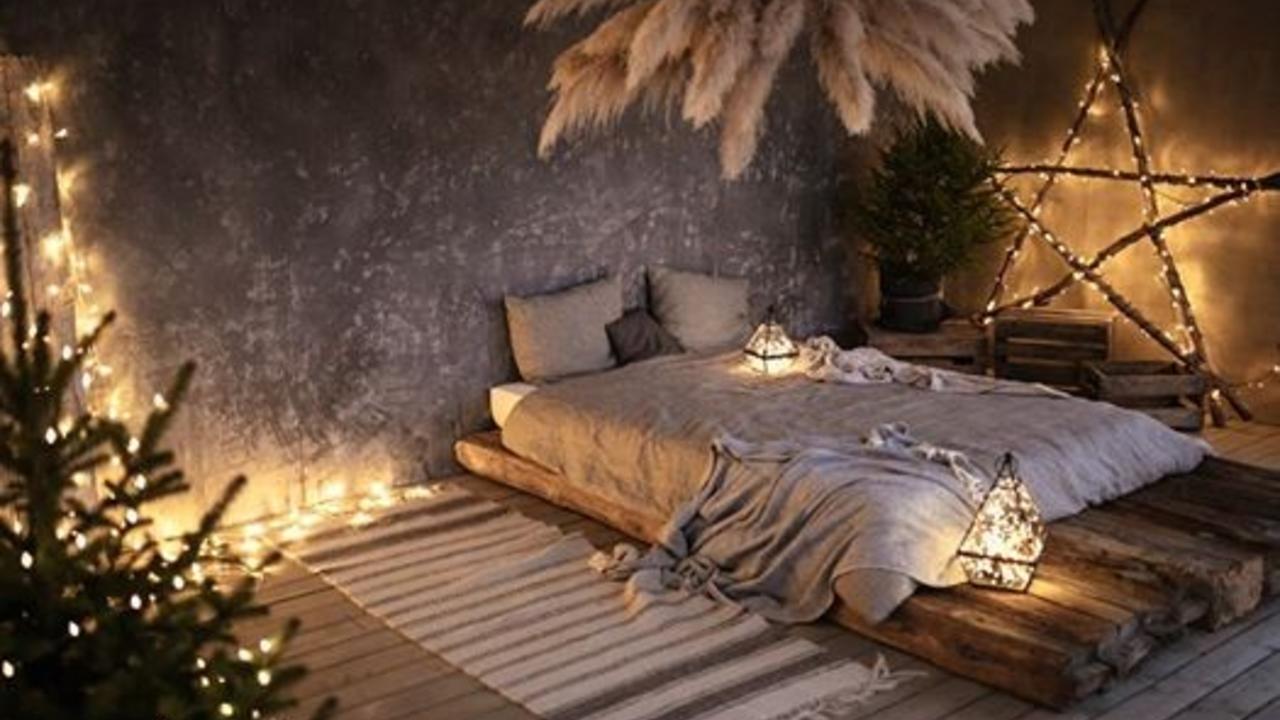
If you ever wondered how to start your own photo studio or you just really interested in how we started then this post is for you!
When opening Golomigo studio, our goal was to build a creative space that we could work in and share with other creators. When planning this huge step, we decided that we don’t want our studio to be just for us. This studio is designed to be rented out and shared with all kinds of different photographers and like-minded people. This is first and foremost a shared creative space.
First steps
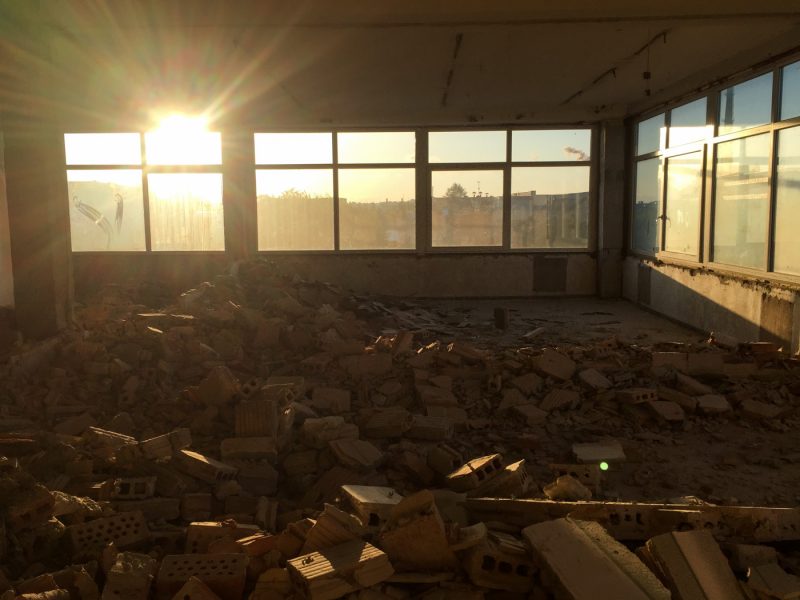
The most important step was to find commercial quarters in a good location. And so we did. But the condition of this place was horrible. We had to reconstruct everything from the ground. The first thing we did when we signed the lease, was throwing out awful Soviet decorations and tearing down some walls. Instead of old concrete walls, we build plasterboard ones. We worked day and night – building, painting, cleaning – to make our studio the way we wanted.
To give you an idea of how the quarters looked before we did all the work, here are a few pictures.


In the beginning, we were very enthusiastic and nothing seemed impossible for us. Although eventually, we had our moments of weakness. It was just a matter of time until we had enough of reconstruction work. But we managed to push each other through those hard moments because that’s what couples do.

After we tore down the walls we thought when we’ll get rid of the construction bricks all the dust will vanish. But the dirt didn’t disappear till we finished ALL of our work. I won’t describe all that we did in detail, because my vocabulary isn’t that good even in my mother tongue to describe some construction/renovating stuff. So, we believe pictures will describe it for you better than a 1000 words…


We laid solid wooden floors for 165 square meters in the photo studio. And it didn’t feel like a never-ending work, because we applied putty 4 times on all concrete walls before that. That was the part that really got on our nerves.
Not to mention we had to bring all of the wooden boards to the 3rd floor, because there is no elevator. All this had to be carried up↓↓


![]()
Small reminder, we built it all by ourselves with some help from our lovely family and friends. Thus we had many hard times finding the right solution. None of us felt we had the needed experience for this job, but we did it anyway!


If you are wondering where we got all the knowledge from, we are modern kids so we learned everything from Youtube videos!!
How to:
- build concrete block walls;
- level concrete floors;
- warm-up the walls;
- and other thing construction workers do.
I think we ended up making this place as good and aesthetically pleasing as we possibly could. People say it feels like home when they visit our studio and it makes us really happy :))


In the beginning, we estimated this project will take 2 months to complete. It ended up taking 11 weeks with help from our friends and family. We worked every minute of every day until we could barely move anymore. And…we haven’t finished everything and opened yet. There is more to come.
Fun part
Everyone asks us where we got our interior details from. There is a simple answer to that. We drove 3000 km back and forth from Kaunas, Lithuania to Munich, Germany with a small truck. Every year this city holds the biggest flea market in entire Europe. We were striving for something out of the ordinary and that was perfect for us!
Of course, we wanted to ship a few things from Bali as we saw beautiful things when we traveled there. But we found it hard to order things online when you aren’t actually there. In the end, we only managed to get one tiny car from there! But we have plans to take a big empty bag for beautiful stuff the next time when we fly to the Indonesian islands.

In the Munich flea market we got so many things there we didn’t have storage to keep it. We didn’t have the quarters at that moment and we needed space to restore them and paint. Justinas parents lend us someplace at their house where we did all the ‘manufacturing’ work… we found perfect the paint for distressing techniques and worked with it till all the furniture details were done.

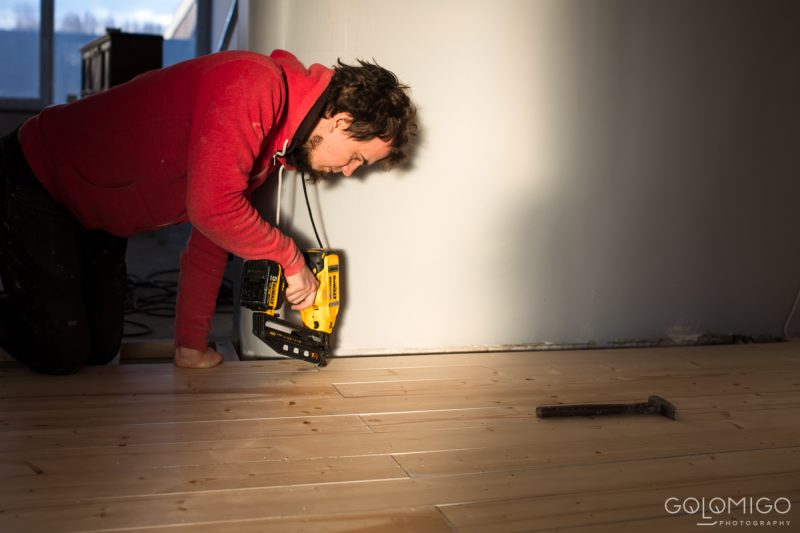
Justinas also wanted to build one wall to work as a backdrop for his photos. He made a frame on the wall and then he used a pneumatic staple gun to fix in the wooden boards. He was aiming for a specific texture. We then covered it with ocean blue paint and it was done.


Repurposed Decor Ideas
We certainly take many things for granted these days and for sure don’t appreciate home goods as our grandparents did. So we took advantage of everything we could find. One man’s trash is another man’s treasure after all. We repurposed a lot of the things we bought in the flee market. Also, found and renovated old items from our parents and friends.
One of the examples is an old timber for the bed in our photo studio. We got it from our friend’s barn which they wanted to tear down. We helped them to tear apart the barn and set it on fire. We, of course, took precautions to make everything safe and fun.


Other things came from somewhere even more special. We got it from friends who own a farm sanctuary. They rebuilt the hut for their animals and were left with a lot of unwanted wooden planks. We took them in, re-painted with one of the distressing techniques and now we love it! On our way back from their barn we stopped at hogweed forest, where we collected many of them and they became great design elements in our photo studio.

Also, we collected some old windows with wooden frames from a window company’s dumpster. These unwanted windows turned out into a beautiful wall. We even found some chairs left by a dumpster. We renovated them and now they serve as perfect office chairs!
We still have some things at our storage room waiting for it’s time to see the daylight. We are full of surprises and haven’t revealed it all yet.
Now, More Hard Work.
Now we are working hard again. It takes 10, 000 hours of work to become a master of your craft. There are no shortcuts or magic formulas, just hard work. But we are getting there.
We had to close this photo studio due to the building reconstruction. Now we are concentrating more time teaching other photographers. You can join our free online workshop here.
Practical tips guiding you from first-dollar to full-time photographer.
We hate SPAM. We will never sell your information, for any reason.